To reduce slips in your bathroom, choose slip-resistant flooring like textured tiles or coatings that stay safe when wet. make certain there is good lighting to improve visibility and keep pathways clear of clutter. Install sturdy grab bars near the shower, tub, and toilet, and use walk-in showers or barrier-free designs for safer access. Proper drainage and gentle floor slopes prevent water pooling. If you keep these tips in mind, you’ll find more ways to create a safer bathroom environment.
Key Takeaways
- Use slip-resistant flooring materials, textured tiles, and non-slip coatings to prevent falls in wet areas.
- Install grab bars and support handles in strategic locations for stability.
- Ensure pathways are clear of clutter and obstacles to facilitate safe movement.
- Incorporate proper lighting to improve visibility and reduce the risk of slips.
- Design barrier-free, level-floor showers with textured surfaces and effective drainage to eliminate trip hazards.
Prioritize Non-Slip Flooring Materials
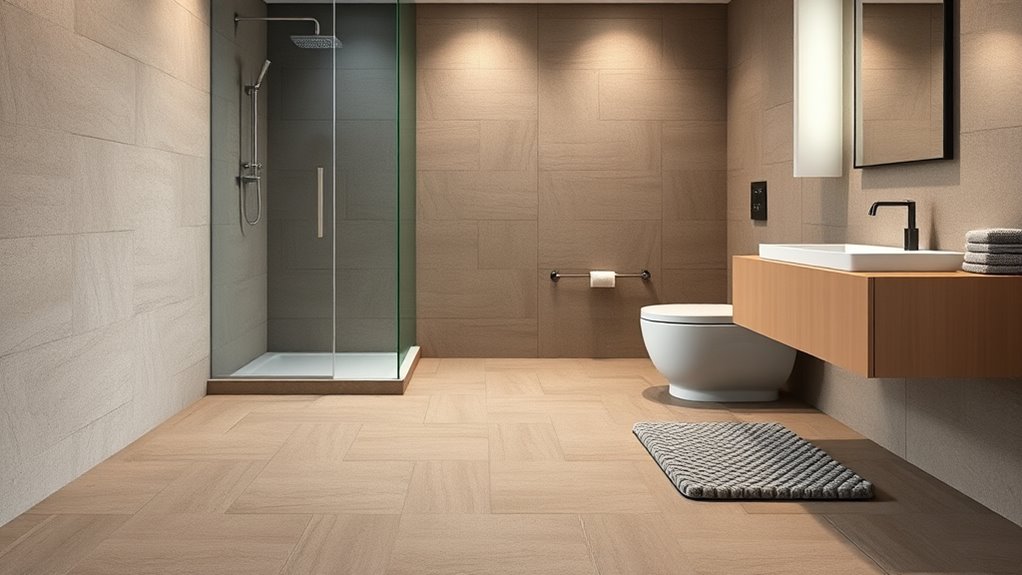
Choosing the right flooring is essential to prevent slips in your bathroom. Non-slip coatings are a popular solution, providing an extra layer of grip on standard surfaces. These coatings can be applied to existing tiles, making your bathroom safer without a complete remodel. Textured tiles are another excellent option, offering natural traction thanks to their rough surface. When selecting flooring, look for materials specifically designed for slip resistance, especially in wet areas. Combining textured tiles with non-slip coatings creates a double layer of safety, reducing the risk of falls. Remember, the goal is to create a surface that maintains grip even when wet, so prioritize these options to keep your bathroom safe and secure.
Incorporate Adequate Lighting for Visibility
Make sure your bathroom is well-lit to improve safety and visibility. Brighten dark corners, add task lighting near the sink and shower, and consider installing dimmable lights for flexibility. Good lighting helps you see potential hazards clearly and prevents slips before they happen. Incorporating AI-driven solutions in lighting design can further optimize illumination for safety.
Brighten Dark Corners
Dark corners in your bathroom can pose a slipping hazard, but adding the right lighting makes a big difference. A lighting enhancement focused on these areas guarantees better visibility and reduces accidents. Installing wall-mounted or recessed lights near corner shelving highlights the space and prevents shadows that can hide potential hazards. Consider using LED strips along edges or under shelves to create a soft, even glow. Brightening dark corners not only improves safety but also makes the space feel larger and more inviting. Proper illumination allows you to clearly see the floor, grab bars, and other fixtures, minimizing the risk of slips. Additionally, incorporating color temperature adjustments can optimize the lighting for both safety and aesthetic appeal. By strategically incorporating lighting enhancement and utilizing corner shelving effectively, you create a safer, more functional bathroom environment.
Use Task Lighting
Effective task lighting is essential for maintaining safety in your bathroom, especially around areas like the sink, mirror, and shower. Proper vanity lighting ensures you see clearly, reducing the risk of slips or mishaps. Good mirror illumination helps you perform daily routines safely and accurately. To maximize visibility, consider installing focused lights directly above or beside your mirror. Bright, even lighting minimizes shadows and prevents blind spots. You can also add targeted lighting around the sink area to improve clarity. Remember, adequate task lighting isn’t just about brightness; it’s about creating a safe, functional space. Proper lighting placement and selecting suitable fixtures can also prevent glare and shadows, further enhancing safety and visibility.
- Avoid harsh, uneven lighting that causes glare
- Use multiple light sources for balanced illumination
- Ensure lights are moisture-rated for bathroom use
Install Dimmable Lights
Installing dimmable lights allows you to adjust your bathroom’s brightness to suit different tasks and times of day, enhancing safety and comfort. With dimmable lighting, you can set the perfect level of brightness, reducing shadows and glare that might cause slips. This adjustable brightness ensures better visibility during shaving, applying makeup, or stepping out of the shower. Consider different fixtures to create layered lighting—overhead, task, and ambient—to optimize safety. The right lighting setup minimizes trip hazards, especially in low-light conditions. Additionally, attention in creative practice can be cultivated to focus on safety details, ensuring thoroughness in your lighting design. Here’s a quick overview:
| Lighting Type | Purpose | Benefits |
|---|---|---|
| Dimmable Lights | Adjustable brightness | Customizable for comfort |
| Overhead Lights | General illumination | Brightens entire space |
| Task Lighting | Focused illumination | Enhances visibility for tasks |
Design Clear and Uncluttered Pathways

Creating clear and uncluttered pathways in your bathroom is essential for preventing slips and falls. Ensuring pathway clarity means removing obstacles that can cause tripping hazards. Unobstructed routes allow you to move safely, especially in emergencies or when your mobility is limited. To achieve this, keep floors free of clutter, such as towels, toiletries, and laundry. Arrange frequently used items within easy reach to avoid unnecessary movement. Consider using storage solutions that tuck away items and maintain open walking spaces. Remember, the goal is to create a safe environment where pathways are obvious and unobstructed. Maintaining the right flooring materials can also significantly reduce slip risks and enhance safety.
Strategically Position Grab Bars and Support Handles
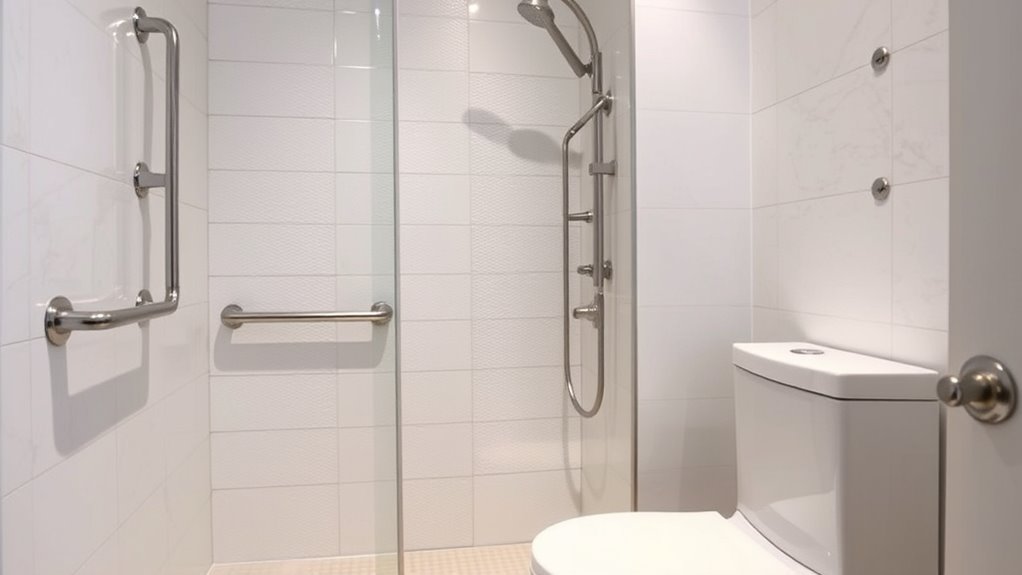
You should place grab bars and support handles where you need the most stability, such as near the shower, tub, and toilet. Make sure they are securely mounted into wall studs or solid backing to prevent accidents. Proper placement and strong mounting are key to providing reliable support when you need it most. Incorporating safety regulations during installation ensures the fixtures meet safety standards and offer maximum protection.
Optimal Placement Strategies
Strategic placement of grab bars and support handles is essential for maximizing safety and reducing the risk of slips in the bathroom. Using mathematical modeling helps determine the most effective locations based on user movement patterns and body mechanics. Historical trends show that placing handles near the toilet, shower, and bathtub considerably improves safety. To optimize placement, consider these points:
- Install grab bars at heights suited to user needs, typically around waist to shoulder level.
- Position handles within easy reach without stretching or twisting.
- Focus on high-traffic areas where slips are most likely to occur.
- Incorporating wall organization systems can help keep bathroom essentials accessible, reducing the need for awkward reaching that may compromise safety.
Secure Mounting Techniques
To guarantee grab bars and support handles provide maximum safety, proper mounting techniques are essential. First, choose secure mounting methods, such as anchoring into wall studs or using specialized toggle bolts, to ensure stability. Avoid relying solely on adhesive mounts; instead, combine them with anti-slip adhesives for extra grip, especially on smooth surfaces. When installing, confirm the placement is at a comfortable height and accessible location. Use a level to keep handles straight and ensure even weight distribution. Regularly check the integrity of the mountings and tighten fixtures as needed. Proper secure mounting reduces the risk of slips and falls, offering reliable support when you need it most. Remember, well-installed grab bars can be a vital safety feature in your bathroom. Additionally, consulting load‑planning tools can help you determine the appropriate weight capacity for your fixtures, ensuring long-term safety and reliability.
Optimize Shower and Bathtub Access
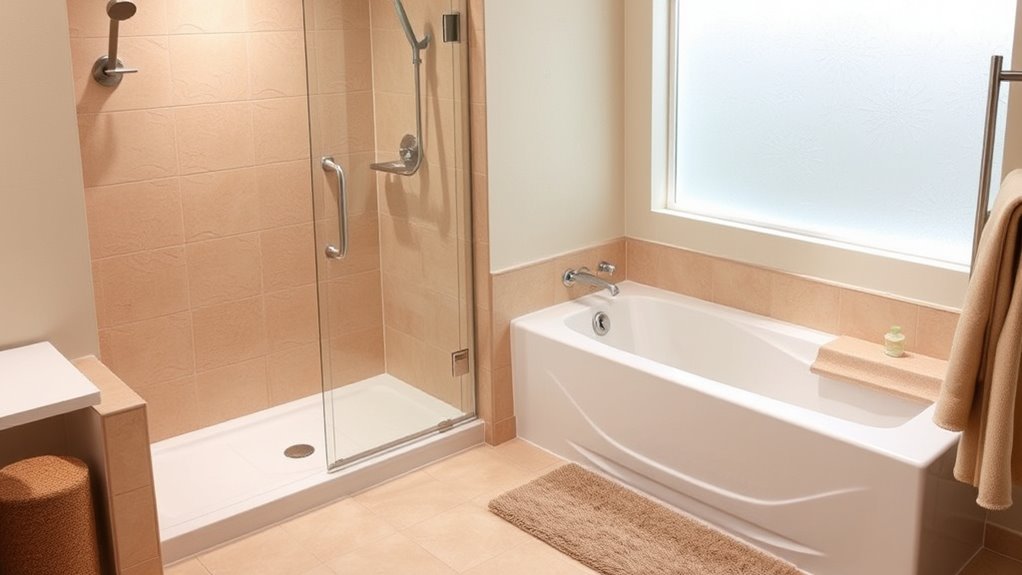
Ever wondered how to make shower and bathtub access safer and more comfortable? Improving access starts with thoughtful shower door design and ensuring bathtub accessibility. Choose sliding or low-threshold shower doors to minimize tripping hazards. For bathtubs, consider walk-in styles or adding built-in seats to ease entry and exit. Incorporating non-slip mats and textured surfaces inside the shower or tub further enhances safety. To optimize safety:
Enhance safety with low-threshold shower doors and walk-in tubs for easier, secure bathing access.
- Use wide, unobstructed doorways for easy movement
- Install grab bars near entry points
- Select non-slip mats or textured surfaces inside the shower or tub
These modifications reduce the risk of slips and falls. Properly designed shower doors and accessible bathtubs make a significant difference in safety, especially for seniors or those with mobility challenges. Making these adjustments creates a more secure, comfortable bathing experience.
Use Elevated or Textured Surfaces for Safety Zones

Adding elevated or textured surfaces in key safety zones can greatly reduce slips and falls in your bathroom. Textured surfaces provide better grip, especially in areas prone to water accumulation, like near the shower or sink. Installing textured tiles or mats in these safety zones helps prevent slipping, even if the floor gets wet. Elevating certain areas, such as step-up thresholds or small platforms, creates clear distinctions and reduces the risk of missteps. These design choices encourage safer movement in high-risk spots, giving you more confidence when moving around your bathroom. By focusing on textured surfaces and elevated features in your safety zones, you create a safer environment that minimizes slip hazards and promotes better footing throughout your bathroom. Additionally, choosing slip-resistant flooring options can further enhance safety and prevent accidents.
Plan for Proper Drainage to Prevent Water Accumulation

Proper drainage is key to maintaining a safe bathroom environment by preventing water from pooling in walkways and high-traffic areas. To achieve this, ensure your layout includes effective drainage channels that direct water toward the drain. Proper slope design helps water flow naturally toward these channels, reducing the risk of water pooling. Consider the following:
- Install drainage channels in strategic locations to catch water early
- Design the floor with a gentle slope (1-2%) toward the drain
- Use non-slip, textured surfaces around drainage points to prevent slips
These measures promote quick water removal, reducing slip hazards. By planning for proper drainage, you prevent water accumulation and create a safer bathroom space for everyone.
Arrange Fixtures to Minimize Sharp Turns and Obstacles

Arranging fixtures thoughtfully can considerably reduce the risk of slips and falls in your bathroom. Proper fixture placement ensures clear pathways, minimizing sharp turns that can cause imbalance. Position the toilet, sink, and shower to create a logical flow, so you don’t need to navigate around obstacles. Eliminate unnecessary obstacles by choosing compact fixtures or relocating items that block your path. Keep the walking area wide enough for comfortable movement, especially for those with mobility challenges. Avoid placing fixtures in tight corners or narrow spaces where movement is restricted. By carefully planning fixture placement and removing obstacles, you create a safer, more accessible bathroom environment that reduces the likelihood of slips and falls.
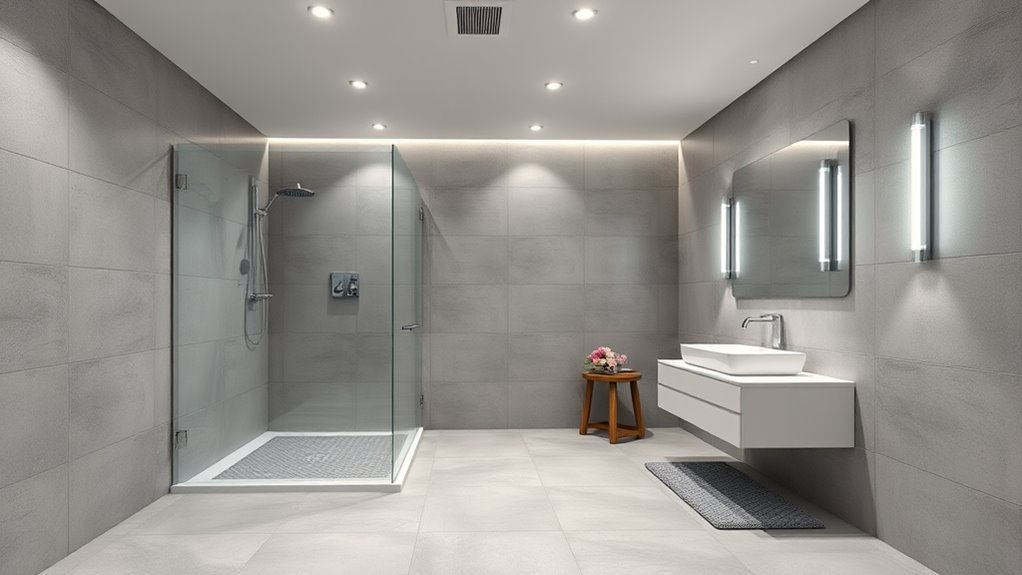
Consider Walk-In Showers and Barrier-Free Designs
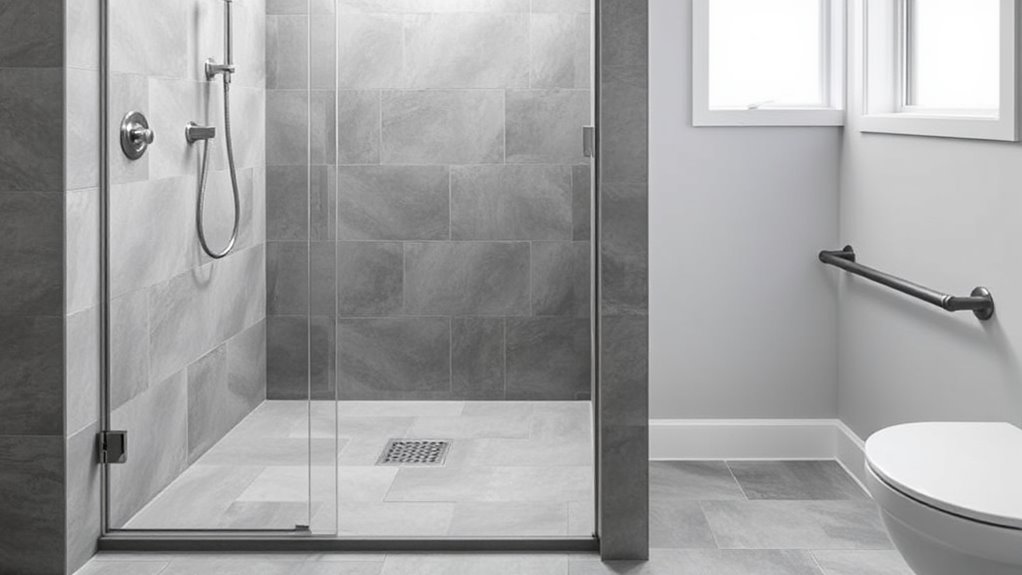
Have you considered installing a walk-in shower or barrier-free design to enhance safety? These options eliminate the need for steps or thresholds, reducing trip hazards and making entry easier. Walk-in showers with seamless, level floors create a smooth surface that minimizes slipping risks. Barrier-free designs guarantee accessibility for everyone, particularly those with mobility challenges.
Consider installing a walk-in or barrier-free shower for safer, easier entry and enhanced accessibility.
- Use non-slip flooring materials for added safety
- Incorporate grab bars within easy reach
- Keep the shower area clutter-free to prevent falls
Frequently Asked Questions
How Can I Prevent Slips on Wet Bathroom Surfaces Effectively?
To prevent slips on wet bathroom surfaces, you should use non-slip mats in key areas like the shower and bathtub. Installing textured surfaces or anti-slip tiles on the floor provides extra traction, reducing fall risks. Make sure to keep these mats clean and dry, and always dry the bathroom floor after use. These simple steps considerably boost safety and help you avoid accidents caused by slippery surfaces.
What Are the Best Lighting Options for Enhanced Bathroom Safety?
You should consider installing bright, well-placed lighting fixtures and safety sensors, as studies show proper lighting can reduce bathroom accidents by up to 50%. Use LED fixtures for consistent illumination and position them to eliminate shadows. Safety sensors automatically turn on lights when you enter, ensuring visibility at all times. Combining these options creates a safer environment, helping you navigate wet surfaces confidently and reducing slip risks effectively.
How Should I Organize Bathroom Items to Avoid Clutter and Falls?
You should organize your bathroom items using smart bathroom storage solutions to prevent clutter and falls. Keep frequently used items within easy reach, and use shelves or cabinets for shower organization to avoid water spills on the floor. Store heavy or sharp objects safely out of children’s reach. Regularly tidy up your bathroom space to maintain a clutter-free environment, reducing the risk of slips and falls while ensuring everything you need is readily accessible.
Which Grab Bar Placements Are Most Effective for Safety?
You should install grab bar types like horizontal, vertical, and angled bars in key areas for maximum safety. Place them near the toilet, inside and outside the shower, and by the bathtub, ideally at different heights to suit various needs. Use strategic placement strategies, ensuring they’re secure and reachable without stretching. Proper placement helps prevent falls and provides stability, making your bathroom safer for everyone.
What Design Features Help Prevent Water Pooling and Slipping?
Ever imagined stepping onto a bathroom floor that feels safe and dry? To prevent water pooling and slipping, you should install non-slip flooring and incorporate effective drainage solutions. Proper slope design directs water toward drains, while textured surfaces reduce slipperiness. Combining these features guarantees water flows away quickly, keeping your bathroom safe. Have you contemplated how strategic layout choices can make your space both functional and secure?
Conclusion
By incorporating these thoughtful bathroom layouts, you’ll create a space that’s safer and easier to navigate—like a well-lit path through a forest. Prioritizing slip-resistant surfaces, clear pathways, and strategic fixtures helps prevent accidents and boosts confidence. Remember, a well-designed bathroom isn’t just functional; it’s a sanctuary where safety and comfort walk hand in hand, making every visit feel as smooth and reassuring as a gentle stream flowing freely.