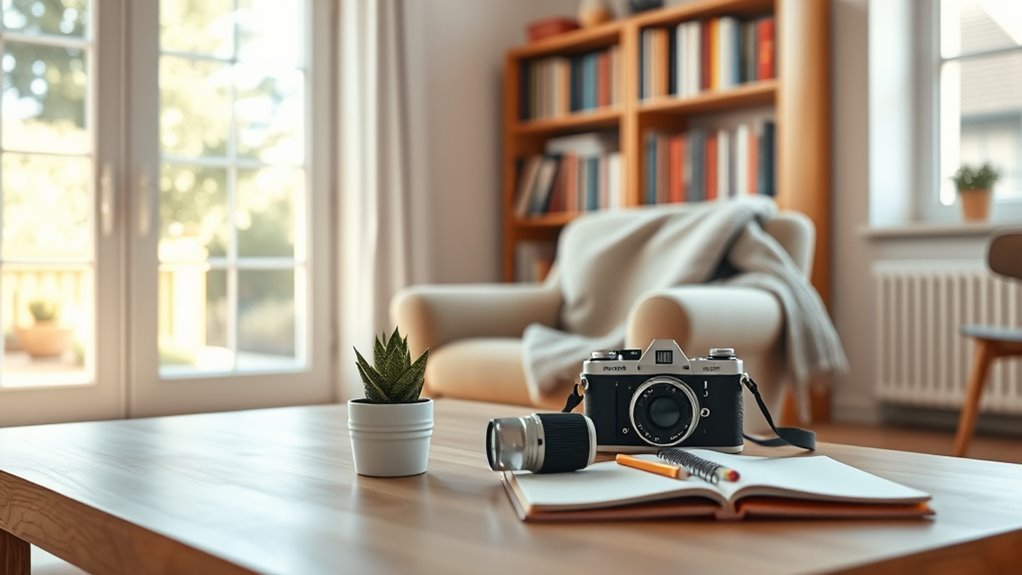

You can start capturing stunning photos at home by arranging everyday objects into creative still lifes using natural light and textured backgrounds. Experiment with shadows and silhouettes to add drama, or try macro shots of household items to highlight details. Use simple DIY setups like a lightbox for product shots or rely on window light for portraits and textured fabrics. Keep exploring these easy projects to develop your skills and discover new ways to express yourself through photography.
Key Takeaways
- Create still life compositions with everyday objects, flowers, and textured fabrics for visually appealing images.
- Use natural light near windows at different times of day to enhance textures and moods.
- Build simple DIY lightboxes for product photography to achieve studio-like results at home.
- Capture daily life moments with smartphones, focusing on details and using minimal editing for authenticity.
- Experiment with shadows, silhouettes, and layering to add depth and interest to your home photography projects.

BOSMILLER Power Lift Recliner Chair for Elderly with Vibration Massage and Lumbar Heating Electric Oversized Single Sofa with Cup Holder and USB Charge Port for Living Room
As an affiliate, we earn on qualifying purchases.
Creative Still Life Arrangements
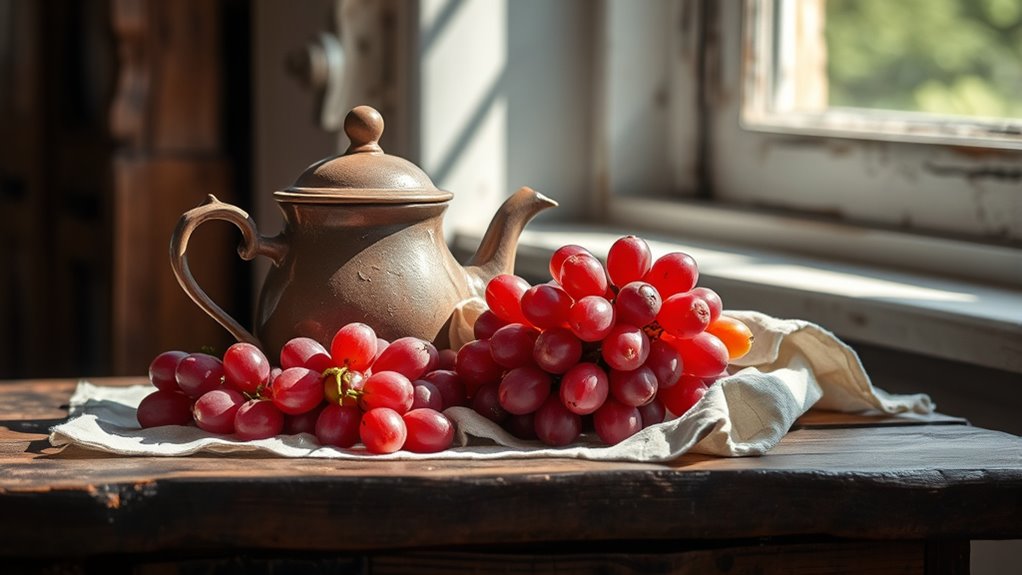
Have you ever wondered how to turn everyday objects into mesmerizing still life compositions? You can start with simple flower arrangements or fruit compositions. Arrange flowers in a glass vase or pile colorful fruit on a neutral cloth to create visual interest. Play with different textures, shapes, and colors to make your scene stand out. Use various containers, like bowls or jars, to add variety. Keep the background simple to keep the focus on your arrangement. Don’t be afraid to experiment—try layering items or varying heights for depth. By thoughtfully combining everyday objects, you craft compelling still life scenes right at home. These arrangements not only enhance your photography skills but also turn ordinary objects into enthralling works of art. Incorporating composition techniques can further elevate your photos and create more balanced and engaging images.
Amazon Product B0DNZ5RVZP
As an affiliate, we earn on qualifying purchases.
Capturing Light and Shadows
To capture compelling images, you can start by playing with natural light, observing how it changes throughout the day. Shadows can be used creatively to add depth and mood to your photos, or you might experiment with artificial lighting to control the scene precisely. By exploring these techniques, you’ll discover new ways to highlight your subject and create striking contrasts. Additionally, understanding the importance of proper appliance maintenance plans can ensure your equipment remains in optimal condition for your photography needs.
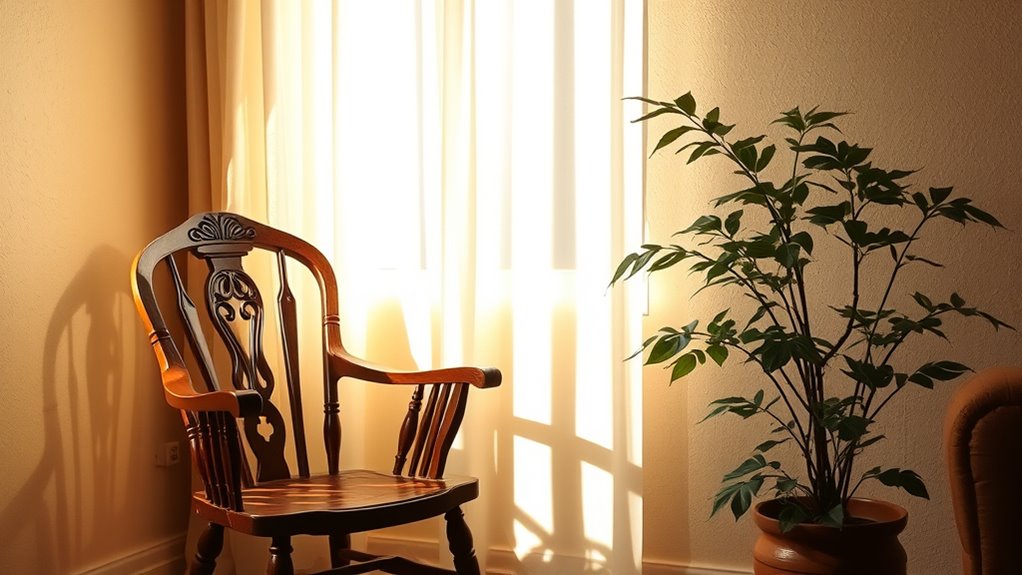
Playing With Natural Light
Ever wondered how natural light can transform your home photography? Playing with natural light allows you to create stunning photos by highlighting textures and moods. Position yourself near windows to take advantage of soft, diffused light that flatters skin tones and adds depth. Use simple studio backgrounds like plain walls or fabric backdrops to keep the focus on your subject and enhance the light’s effect. Experiment with different times of day to see how shadows and brightness change, giving your photos a unique feel. After shooting, employ editing techniques to fine-tune exposure and contrast, emphasizing the natural light’s impact. Being aware of color temperature adjustments can help you optimize your images for a more authentic and appealing look, making every shot at home a compelling visual story.
Using Shadows Creatively
Using shadows creatively can add depth and drama to your home photography by emphasizing contrast and texture. Focus on shadow shapes to create intriguing compositions or tell stories through silhouettes. Play with light angles to cast interesting shadows on walls or surfaces, turning everyday objects into artistic elements. Experiment with silhouette storytelling by capturing figures or objects against bright backgrounds, highlighting their outlines for emotional impact. To inspire you, here’s a simple grid of ideas:
| Shadow Shapes | Silhouette Storytelling | Light Angles |
|---|---|---|
| Leaves on a wall | Person by window | Low morning light |
| Furniture’s shadow | Silhouetted plants | Side sunlight |
| Hand gestures | Silhouetted animals | Evening glow |
Use these techniques to transform simple shadows into compelling visual narratives at home. Incorporating lighting techniques can further enhance your shadow play, creating a more dynamic and engaging scene.
Experimenting With Artificial Lighting
Experimenting with artificial lighting opens up a world of creative possibilities for capturing light and shadows indoors. Using a studio flash allows you to control the intensity and direction of your light source, helping you craft dramatic effects. To add color and mood, incorporate colored gels over your flash or studio light; this technique can transform a simple setup into a vibrant scene. Play with different angles and distances to create striking shadows or highlight textures. Adjusting the power of your lighting setup helps you experiment with contrast and depth. Don’t be afraid to combine multiple light sources or use reflectors to bounce light and soften shadows. Having a good understanding of divorce statistics and the importance of proper resource management can inspire you to explore new artistic expressions right at home. With these tools, you can easily explore new artistic expressions right at home.

MAHOMICO Power Lift Recliner Chair for Elderly with Vibration Massage and Lumbar Heating, Electric Lift Recliner Single Sofa with Side Pocket, Two Cup Holders and USB Charge Port for Living Room
As an affiliate, we earn on qualifying purchases.
Macro Photography With Household Items
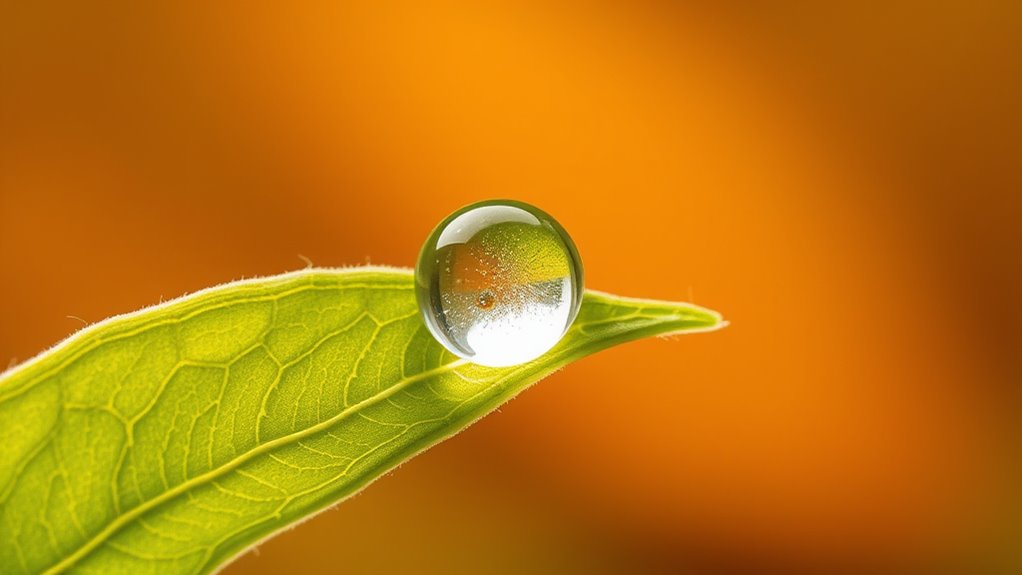
You can discover tiny details in everyday objects around your home by trying macro photography. Choosing common items like jewelry, leaves, or textured fabrics helps you explore textures and patterns up close. These simple choices reveal fascinating new perspectives that transform the ordinary into mesmerizing images. Incorporating close-up techniques can further enhance your ability to capture intricate details with clarity.
Exploring Tiny Details
Discovering tiny details in household items transforms everyday objects into fascinating subjects. When you zoom in, you can create abstract compositions that highlight textures, patterns, and shapes often unnoticed. Focus on areas with strong color contrasts—like a vibrant fruit peel against a dull surface or shiny metal next to matte finishes—to add visual impact. Use a macro lens or the macro setting on your camera to capture these intricate details sharply. Experiment with angles and lighting to emphasize textures and patterns. Maximize space and organization by arranging objects to better appreciate their subtle features. By paying attention to these minute elements, you turn simple objects into intriguing works of art. This approach invites viewers to see familiar items in a new, captivating way and enhances your skill in revealing the beauty hidden in everyday household objects.
Choosing Everyday Items
Selecting the right household items is essential for successful macro photography, as everyday objects often contain intriguing details worth capturing. Look for items with interesting textures, patterns, or colors that can shine through your lens. Incorporate colorful filters to enhance the mood or highlight details, and consider using vintage props to add a nostalgic feel. These small touches can transform ordinary objects into mesmerizing images. Keep an eye out for:
- Unique textured fabrics or paper
- Vintage jewelry or trinkets
- Fruits, vegetables, or spices with vibrant colors
- Waterwick pots and other innovative planters that showcase interesting surfaces and designs.
Portraits Using Natural Light
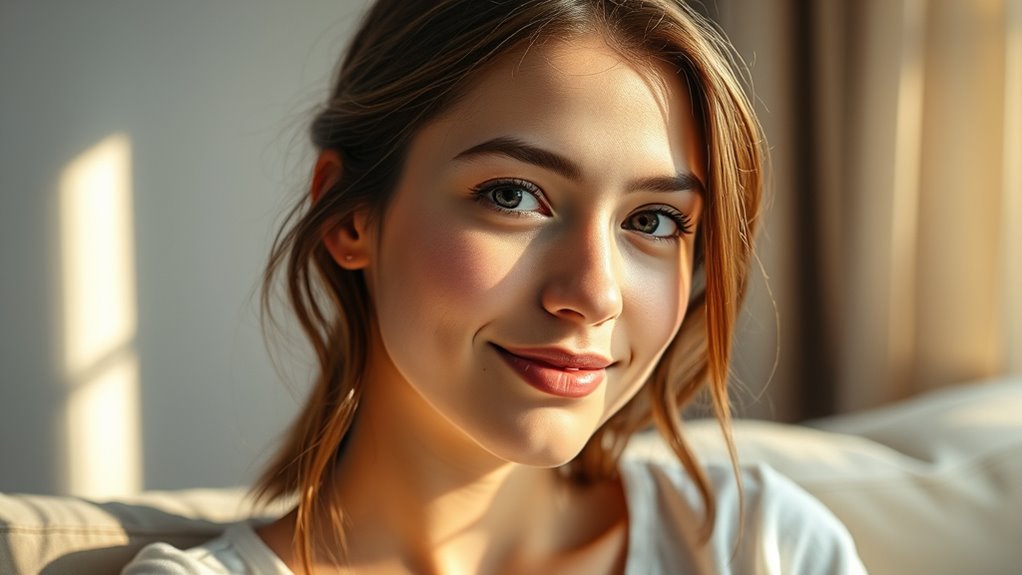
Natural light offers a beautiful and versatile way to capture stunning portraits at home. To make the most of it, experiment with different lighting techniques like shooting near windows or during golden hour for soft, flattering light. Position your model so the light falls evenly on their face, avoiding harsh shadows. Play with angles to highlight features or create mood. Guide your model through simple posing ideas—turning their face slightly, tilting their chin, or relaxing their shoulders—to add variety and naturalness. Use reflectors or white surfaces to bounce light into darker areas if needed. Keep your background simple and uncluttered to focus attention on your subject. Understanding HEPA filtration and how it captures particles can help you assess how different lighting setups reveal textures and details in your portraits. With attention to lighting techniques and model posing, you’ll create compelling portraits using just natural light at home.
Exploring Textures and Patterns

After mastering how to shape light on your subject, adding textures and patterns can bring your portraits to life. Experiment with fabric textures like velvet, burlap, or silk to introduce tactile interest. Patterned wallpapers or textiles can create compelling backgrounds or accents that add depth and personality. These elements catch light differently, emphasizing details and creating visual variety. To explore textures and patterns effectively:
Enhance portraits with textured fabrics and patterned backgrounds for depth and visual interest.
- Use close-ups of fabric textures to highlight their unique surfaces
- Incorporate patterned wallpapers as backgrounds for contrast
- Play with layering fabrics or wallpapers for complex textures
- Understanding visual interest can help you select the most engaging textures and patterns for your images.
DIY Lightbox for Product Shots
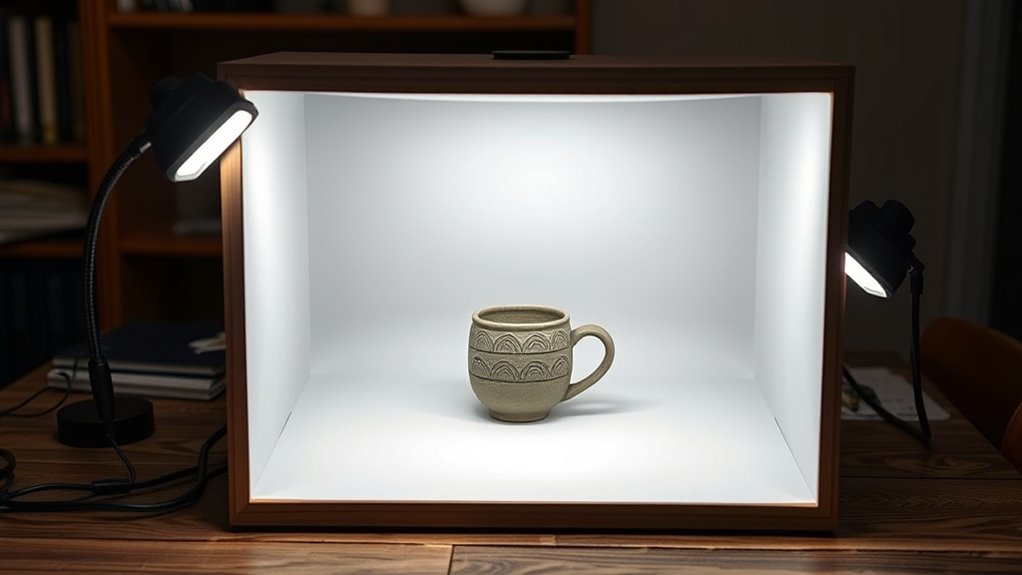
Ever wondered how to achieve professional-looking product photos without expensive equipment? Building a DIY lightbox is a simple, affordable way to improve your shots. Use basic DIY equipment like a cardboard box, white poster board, and tissue paper to create a soft, even light environment. Cut openings on the sides and front for your camera and lighting sources. For lighting techniques, position lamps with diffusers or indirect light to minimize shadows and reflections. Inside, line the box with white surfaces to reflect light evenly. This setup helps evenly illuminate your products, enhancing details and colors. A DIY lightbox offers control over light placement and reduces glare, giving you studio-quality images at home. It’s a practical solution for capturing sharp, clear product shots without costly equipment.
Documenting Daily Life Moments

Have you ever thought about how capturing everyday moments can create meaningful memories? Using your vintage camera or smartphone, you can document daily life with ease. Focus on small details like a cozy breakfast, a walk in the park, or family interactions. These candid shots become treasures over time. To enhance your photos, try simple photo editing techniques to brighten images or add a nostalgic feel. You don’t need professional equipment— just an eye for moments worth preserving. Keep your camera handy to seize spontaneous scenes. You’ll find that these snapshots tell your story and bring back warm feelings later. Remember, the beauty of documenting daily life lies in authenticity and simplicity, making each photo a reflection of genuine moments.
Frequently Asked Questions
What Camera Settings Are Best for Indoor Home Photography?
For indoor home photography, you should focus on aperture control and focal length. Use a wider aperture (lower f-number) to let in more light and create a pleasing background blur. Keep your focal length moderate, around 24-50mm, to avoid distortion and capture more of your scene. Adjust your ISO and shutter speed accordingly to prevent blur. Practice these settings, and you’ll get sharper, well-lit photos inside your home.
How Can I Stabilize My Camera for Sharper Images?
Think of your camera as a ship steering through rough waters; to keep it steady, you need a sturdy anchor. Use a tripod to maximize tripod stability, providing a solid foundation for sharper images. If you’re handheld, embrace techniques like bracing your arms against your body and using a faster shutter speed. These strategies keep your camera steady, helping you capture crisp, clear photos even in challenging indoor lighting.
What Are Affordable Lighting Options for Home Photography?
You can use natural light as an affordable lighting option by shooting near windows during the day. Additionally, DIY reflectors made from aluminum foil, white poster boards, or even sheets of paper can bounce light onto your subject, reducing shadows and creating a softer look. These options are budget-friendly, easy to set up, and help you achieve professional-looking photos without investing in expensive lighting equipment.
How Do I Choose Backgrounds for Still Life Projects?
Choosing backgrounds for still life projects involves selecting decorative backdrops that complement your subject and enhance your composition. You want to contemplate textures, colors, and patterns that add depth and interest. Use natural light sources to highlight the background’s details and create mood. Balance simplicity with contrast, ensuring your background supports rather than overwhelms your main objects. With thoughtful choices, your still life will tell a compelling visual story.
What Editing Tools Enhance Home Photography Images Effectively?
You can enhance your home photography images effectively using editing tools like editing filters and color correction. Filters add creative effects, making your photos stand out, while color correction adjusts brightness, contrast, and color balance, giving your images a polished look. You should experiment with these tools to find the best combination that highlights your subject and creates the mood you want, making your home photography truly shine.
Conclusion
Now that you’ve explored these simple home photography projects, you’re like an artist wielding your everyday surroundings as your canvas. With a little creativity and patience, you’ll turn ordinary objects into extraordinary images, revealing stories hidden in plain sight. Remember, each shot is a window into your world — a chance to see beauty in the mundane. Embrace the process, and let your passion for photography blossom like a flower reaching for the sun.