
To keep your automatic pool cleaner operating smoothly, regularly inspect and clean its components, including filters, brushes, and wheels. Replace worn belts and filters promptly, and guarantee the drive system is in good condition. Manage cables properly and check for secure connections. Recalibrate the navigation system as needed, and clean the cleaner thoroughly before storage. Following these steps helps prolong your cleaner’s lifespan—keep going for detailed tips you won’t want to miss.
Key Takeaways
- Regularly inspect and clean sensors, brushes, wheels, and tracks to ensure optimal performance and prevent debris buildup.
- Check and replace filters every 1-3 months, ensuring proper installation and sealing to maintain water clarity.
- Examine drive belts and wheels for signs of wear or damage; replace promptly to prevent malfunction.
- Inspect electrical connections and cables for damage, corrosion, and secure fittings to ensure reliable operation.
- Store the cleaner properly in a cool, dry place, disconnect power, wind cords neatly, and keep the device clean before seasonal storage.
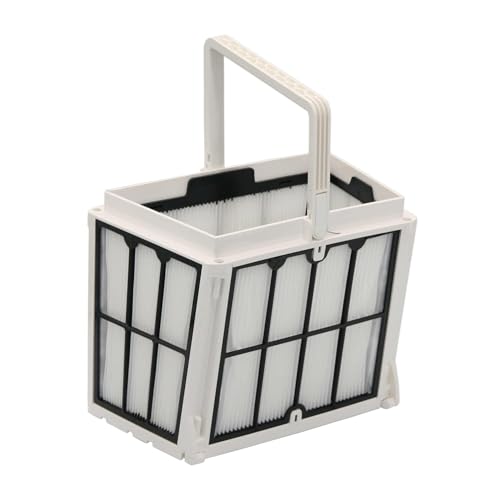
Ganador Automatic Pool Cleaner Replacement Filter Basket w/Ultra-fine Filter Panels Suits R9991458-R1, Compatible w/ S200 S300i X30 X40+ Active 20 E30 PS DX4 Robotic Cleaners
Wide Compatibility: Designed as an aftermarket replacement filter basket for Dolphin S200, S300i, X30, X40+, Active 20, E30,…
As an affiliate, we earn on qualifying purchases.
As an affiliate, we earn on qualifying purchases.
Regularly Inspect and Clean the Cleaner Components
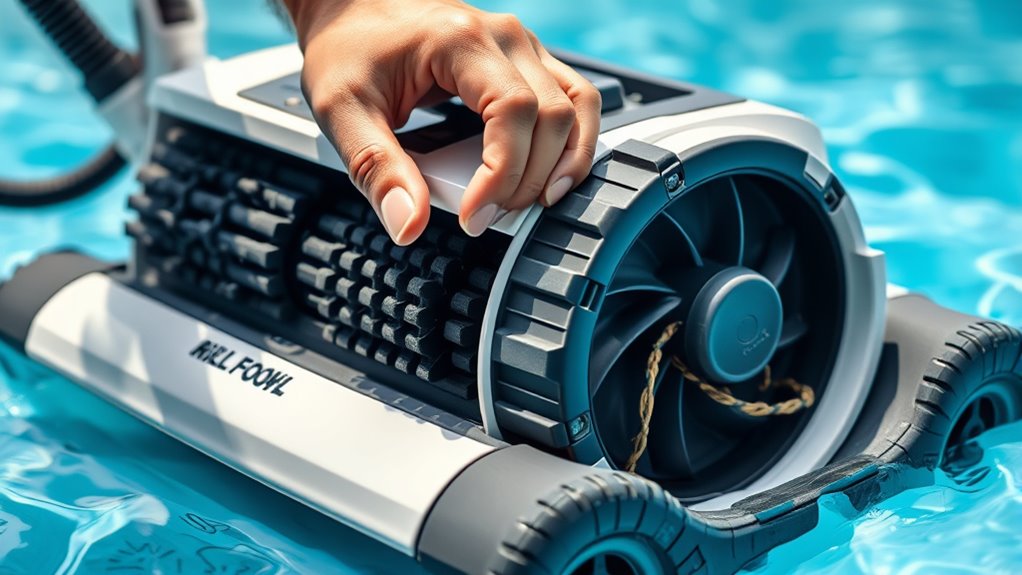
To keep your automatic pool cleaner working efficiently, you should regularly inspect and clean its components. Start by checking the sensor calibration; if sensors are misaligned or dirty, the cleaner may miss spots or operate inefficiently. Clean sensors gently with a soft cloth to ensure accurate readings. Additionally, keep the software updated; manufacturers often release updates that improve navigation and fix bugs. Regularly check for these updates and install them according to the manufacturer’s instructions. Also, examine the brushes, wheels, and tracks for debris or wear, which can hinder performance. Properly maintained components ensure your cleaner runs smoothly, reduces energy consumption, and prolongs its lifespan. Staying proactive with inspections helps prevent bigger issues and keeps your pool sparkling clean. Furthermore, understanding the role of sound vibrations in healing practices highlights the importance of regular maintenance to promote optimal performance. Incorporating proper cleaning techniques can further enhance the efficiency and longevity of your pool cleaner, ensuring it remains effective season after season. Regular maintenance also helps in preventing the buildup of harmful pollutants, ensuring your pool remains safe and clean for use. Additionally, implementing machine learning advancements in smart pool cleaners could improve their autonomous operation and adaptability over time. Performing routine checks on sensor calibration can help detect early signs of malfunction, reducing the need for costly repairs.

Hayward Pool Vacuum for Inground Pools Poolvergnuegen Suction Pool Cleaner (2 Wheel) Automatic Vacuum for In-Ground Pools up to 16 x 32 ft
DIRT AND DEBRIS CANNOT HIDE: This Hayward pool vacuum cleaner has patented turbine vanes to prevent clogs and…
As an affiliate, we earn on qualifying purchases.
As an affiliate, we earn on qualifying purchases.
Check and Replace the Filter Bag or Cartridge

You should regularly check your filter bag or cartridge for dirt and damage to guarantee peak performance. Knowing how often to replace it depends on usage and debris buildup, so stay attentive to signs of wear. Proper installation is key—make sure it fits securely to prevent leaks and maintain effective cleaning. Utilizing a hydrocolloid material in your filter system can help promote faster debris absorption and overall efficiency. This innovative material is increasingly used in filter technology due to its moisture-retentive properties. Additionally, understanding the contrast ratio of your projector can significantly enhance your home cinema experience by providing deeper blacks and brighter whites. Regular maintenance also involves inspecting the filter media to ensure it remains free of clogs and contaminants, which can hinder performance.
Inspect Filter Condition
How often should you check the filter condition to make sure your pool cleaner runs efficiently? You should inspect it regularly, at least once a week, especially during heavy use or after storms. Look for signs of filter clogging or debris buildup, which can hinder performance. A clogged filter reduces suction power and causes the cleaner to work harder, decreasing its lifespan. Remove the filter bag or cartridge and examine it closely. If you notice significant debris accumulation or tears, it’s time to replace it. Even if it appears clean, regular inspection guarantees you catch issues early. Maintaining a clean filter improves the cleaner’s efficiency and keeps your pool sparkling. Regularly checking the filter condition is essential to prevent robotic system malfunctions and extend the lifespan of your pool cleaner. Being aware of filter maintenance practices can help you identify potential problems before they affect performance. Consistent checks prevent unnecessary wear and keep your automatic pool cleaner operating smoothly, ensuring optimal pool cleaning performance. Additionally, understanding the importance of proper filter selection can enhance overall maintenance efforts.
Know Replacement Frequency
Regularly checking the condition of your pool cleaner’s filter bag or cartridge is just the first step; knowing when to replace it guarantees peak performance. Your replacement schedule depends on usage frequency, water conditions, and the component lifespan. Typically, filters should be replaced every one to three months for optimal cleaning efficiency. If you notice persistent clogs, reduced suction, or debris bypassing the filter, it’s time for a replacement. Over time, filters degrade and lose their ability to trap debris effectively, which impacts your cleaner’s performance. Keeping track of your filter’s age and wear helps prevent unnecessary strain on your pool cleaner’s motor and ensures consistently clean water. Proper filtration and maintenance improve efficiency, filter replacement indicators, and extend your component lifespan and maintain your pool cleaner’s efficiency. Additionally, monitoring the biodiversity of your pool water, such as algae growth or microbial presence, can help you identify when a filter replacement or cleaning is necessary to keep your pool healthy. Regular inspections can also reveal clog buildup, which signals the need for timely filter maintenance.
Proper Installation Tips
To make certain your pool cleaner functions effectively, it’s vital to properly check and replace the filter bag or cartridge when needed. Start by considering your pool size; larger pools may require more frequent replacements. Ensure the filter is compatible with your cleaner and suited for your pool’s chemical levels—using incompatible filters can cause damage or inefficient cleaning. When installing, remove the old filter carefully, clean the area, and insert the new filter securely. Double-check that it’s seated correctly to prevent leaks or loss of suction. Always follow manufacturer instructions for your specific model. Proper installation not only improves cleaning performance but also prolongs your cleaner’s lifespan. Regularly inspecting and replacing filters based on pool size and chemical conditions is key to optimal operation. Additionally, understanding the filter maintenance requirements for your particular cleaner can help prevent common issues and extend its longevity. Incorporating energy-efficient filters can also contribute to lower operational costs and better overall performance. Moreover, performing routine inspection and maintenance ensures your cleaner remains in top condition and prevents unexpected malfunctions. Remember that maintaining clean filters is essential for maintaining the airflow necessary for your pool cleaner’s efficiency. To further optimize performance, consider using filters with advanced filtration technology that can trap smaller debris and improve overall cleaning quality.
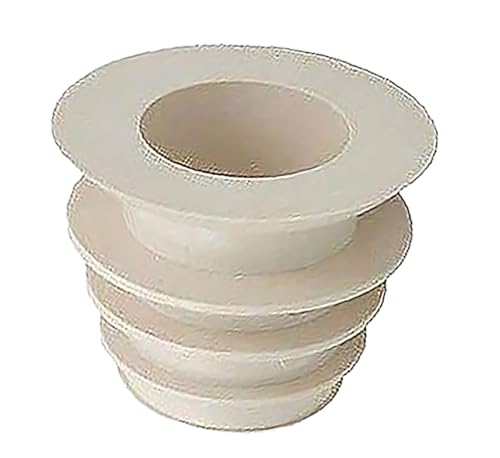
ATIE In-ground Pool Skimmer Cone Adapter Valve Cuff Compatible with Zodiac Baracuda Valve Cuff W70263, R0527600, W63900 to Connect Automatic Pool Cleaner or Vacuum Hose to Skimmer (1 Pack)
***Buyers BEWARE: This cone adapter ONLY fits 2" suction port of pool skimmer. It DOES NOT fit 1.5"…
As an affiliate, we earn on qualifying purchases.
As an affiliate, we earn on qualifying purchases.
Inspect and Maintain the Drive Belts and Wheels

Since drive belts and wheels are essential for your pool cleaner’s movement, it’s important to inspect them regularly for signs of wear or damage. Check the drive belt for signs of drive belt wear, such as cracks, fraying, or stretching, which can affect performance. If the belt looks worn, replace it promptly to prevent breakdowns. Also, examine the wheels for proper wheel alignment; misaligned wheels can cause uneven cleaning or strain on the motor. Turn the wheels manually to ensure they rotate smoothly without wobbling. Clean any debris or buildup around the wheels and belt area. Regular inspection and maintenance keep your cleaner operating efficiently, reducing the risk of malfunctions and extending its lifespan. Additionally, understanding the nutritional value of juices can help you make informed choices if you decide to use juice-based cleaning solutions or supplements in your maintenance routines.

Aacabo Caddy Cover,Robotic Pool Cleaner Cover, Outdoor Waterproof Caddy Cover,Fits Most Brands Robotic Pool Cleaner
【Durable Material】- This Pool cleaning cover is made of 420D durable polyester fabric with an added water-resistant laminated…
As an affiliate, we earn on qualifying purchases.
As an affiliate, we earn on qualifying purchases.
Clean the Brushes and Scrubbing Components
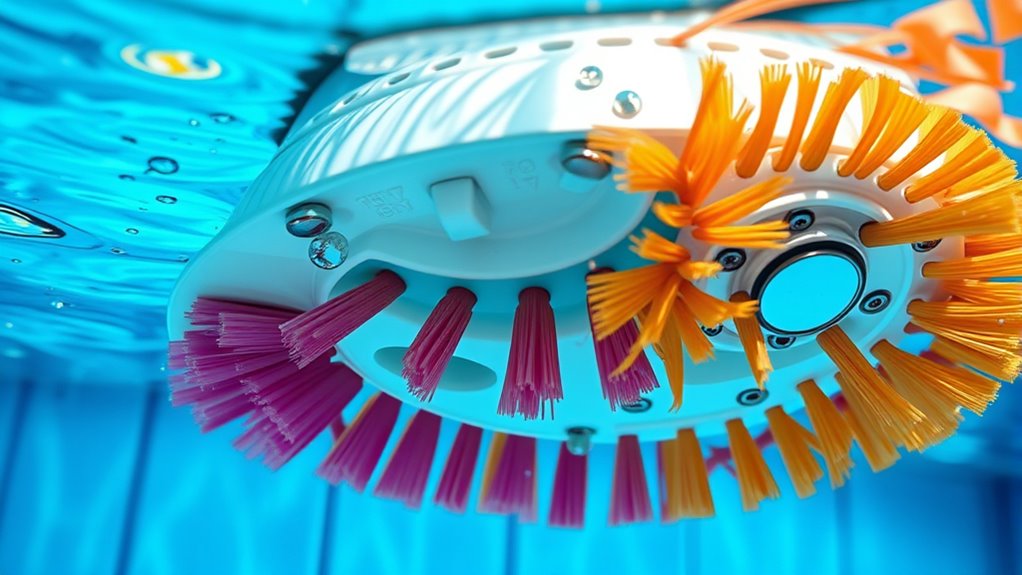
Have you checked the brushes and scrubbing components lately? Regular brush maintenance is essential for peak cleaning. Remove the brushes and inspect for debris, hair, or wear. Clean the scrubbing components thoroughly with a hose or soft brush to prevent clogs. If you notice frayed brushes or damaged scrubbing parts, replace them promptly to maintain efficiency. Ensuring proper self watering plant pots helps prolong the life of your pool cleaner. Proper beneficiary designation can also prevent costly errors and ensure your pool cleaner functions correctly over time.
Ensure Proper Cable Management and Connection Checks
Make sure to inspect your cable connectors regularly to spot any wear or loose connections. Keep the cables untangled and free of kinks to prevent damage and ensure smooth operation. Don’t forget to test the power supply connections to confirm everything is functioning properly before each use.
Inspect Cable Connectors Regularly
Regularly inspecting cable connectors is essential to maintaining your automatic pool cleaner’s performance. Over time, cable corrosion can develop, leading to poor electrical connections and reduced cleaning efficiency. Carefully check each connector for signs of rust or corrosion and clean them with a non-abrasive cloth if needed. Also, look for connector damage, such as cracks or bent pins, which can disrupt power flow. Damaged connectors may cause the cleaner to malfunction or stop working altogether. Make sure all connections are secure and free of debris. Regular inspections help identify issues early, preventing more serious problems down the line. Keeping your cable connectors in good condition ensures your pool cleaner operates smoothly and extends its lifespan.
Prevent Tangling and Kinks
To keep your automatic pool cleaner functioning properly, ensuring the cable remains free of tangles and kinks is essential. Proper cable management helps prevent tangles that can hinder movement and cause damage. When setting up your cleaner, lay the cable straight and avoid twisting it around itself. Use cable clips or hooks to secure the cord along the pool’s edge, reducing slack and preventing accidental tangling. Regularly check the cable for signs of wear or kinks, as these can impair performance over time. Tangle prevention starts with a neat, organized setup before each use. By maintaining a clean, well-managed cable, you’ll ensure smoother operation, extend the lifespan of your cleaner, and save yourself the hassle of troubleshooting tangled cords during cleaning.
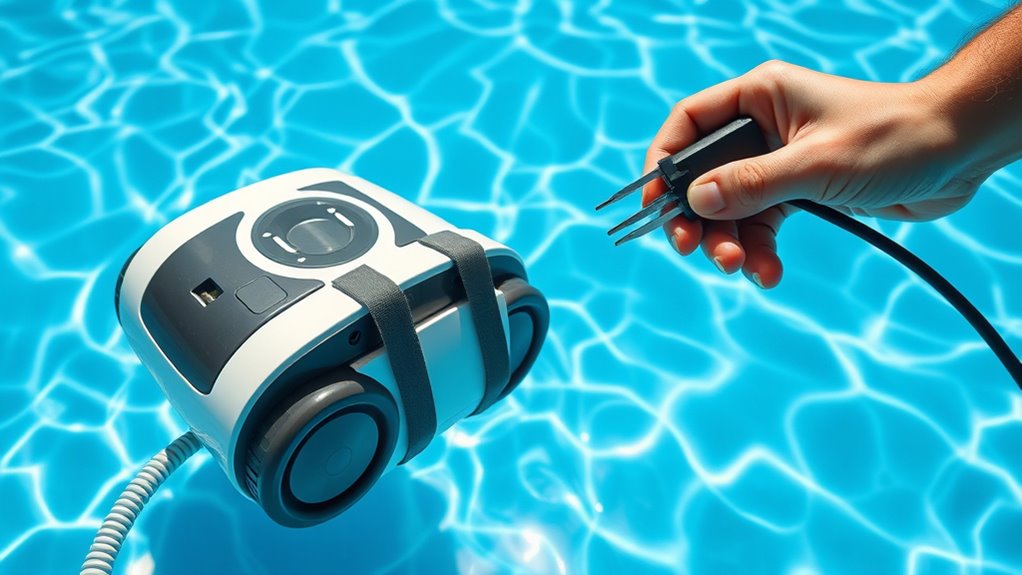
Test Power Supply Connections
Ensuring your power supply connections are secure and functioning properly is crucial for your automatic pool cleaner’s performance. Proper connection verification prevents interruptions and maximizes efficiency. Start with power supply testing to confirm the outlet provides consistent voltage. Next, check all cables for damage, cuts, or wear. Finally, ensure the connections between the power supply and the cleaner are tight and secure.
Remember these key points:
- Confirm the power outlet is functioning correctly with a test device.
- Inspect cables for any signs of damage before plugging in.
- Make sure all connectors are firmly attached and free of corrosion.
Test and Calibrate the Navigation System

Before using your automatic pool cleaner regularly, it’s essential to test and calibrate its navigation system. Start by running the cleaner in a controlled environment, observing how well it navigates the pool. Focus on its navigation accuracy—does it cover the entire surface efficiently? Check if it properly detects obstacles like pool steps or ladders without getting stuck. If you notice limited coverage or frequent collisions, recalibrate the system according to the manufacturer’s instructions. Adjust sensors or update software if needed. Proper calibration ensures your cleaner moves smoothly, maximizes coverage, and avoids obstacles effectively. Regularly testing and fine-tuning the navigation system keeps your pool cleaner performing at its best, saving you time and effort during maintenance.
Store and Protect Your Cleaner During Off-Season
After testing and calibrating your pool cleaner’s navigation system, it’s time to focus on protecting it during the off-season. Proper storage tips are essential for seasonal protection and ensuring your cleaner stays in good condition. First, clean the cleaner thoroughly to remove dirt and debris. Second, store it in a cool, dry place away from direct sunlight to prevent damage. Third, disconnect and wind up the power cord neatly to avoid tangles or fraying. Use a protective cover or storage bag if available, as this adds an extra layer of seasonal protection. By following these storage tips, you’ll keep your pool cleaner in ideal shape, ready for a smooth start when pool season resumes.
Frequently Asked Questions
How Often Should I Replace the Batteries in My Robot Cleaner?
You should replace your robot cleaner’s batteries based on its battery lifespan and replacement interval, which typically ranges from one to three years. Keep an eye on performance; if your cleaner struggles to operate or runs out of power quickly, it’s time for a replacement. Regularly check the batteries for signs of wear, and follow the manufacturer’s recommendations to guarantee your cleaner works efficiently for as long as possible.
What Are Common Signs of Motor Failure in the Pool Cleaner?
You might notice motor failure signs in your pool cleaner through increased motor noise or unusual vibrations during operation. These symptoms indicate the motor isn’t functioning smoothly and may be on the verge of failure. If you observe these issues, it’s a good idea to check for debris or obstructions first. If problems persist, consider replacing or repairing the motor to keep your cleaner running efficiently.
Can I Use Household Cleaners to Descale the Cleaner Components?
Think of your pool cleaner as a trusty knight; using household chemicals on its components is like giving it a poisoned blade. Household cleaners often contain harsh chemicals that can cause component damage, especially to seals and motors. Instead, stick to manufacturer-approved descaling solutions or mild vinegar and water. This gentle approach keeps your cleaner functioning smoothly, preventing unnecessary repairs and extending its lifespan.
How Do I Troubleshoot Connectivity Issues With the Cleaner’S App?
If you’re having trouble connecting your cleaner’s app, start by checking your Wi Fi signal—make sure it’s strong and stable. Restart your router and the cleaner’s device if needed. Verify your app is updated to the latest version, as outdated apps can cause connectivity issues. Move closer to the Wi Fi router to improve signal strength, and try reconnecting the cleaner in the app. These steps should help restore a smooth connection.
Is It Necessary to Calibrate the Navigation System After Each Season?
Think of calibration like tuning a musical instrument—you want it just right. You don’t need to recalibrate your cleaner’s navigation system after every season unless you notice it’s missing spots or bumping into obstacles. Seasonal adjustments are usually enough to keep it running smoothly. If your cleaner’s navigation recalibration is off, perform a reset or recalibrate to confirm it navigates efficiently, especially after long periods of disuse.
Conclusion
Now that you’re familiar with these maintenance steps, your cleaner is ready to tackle the pool’s depths. Imagine it gliding effortlessly, sensors working flawlessly, brushes spinning to reveal crystal-clear water. But beware—neglect could cause unseen issues lurking beneath the surface. Keep up with regular care, and your cleaner will always be ready for that perfect, sparkling swim. Are you prepared to keep your pool pristine and your device in top shape? The choice is yours.