
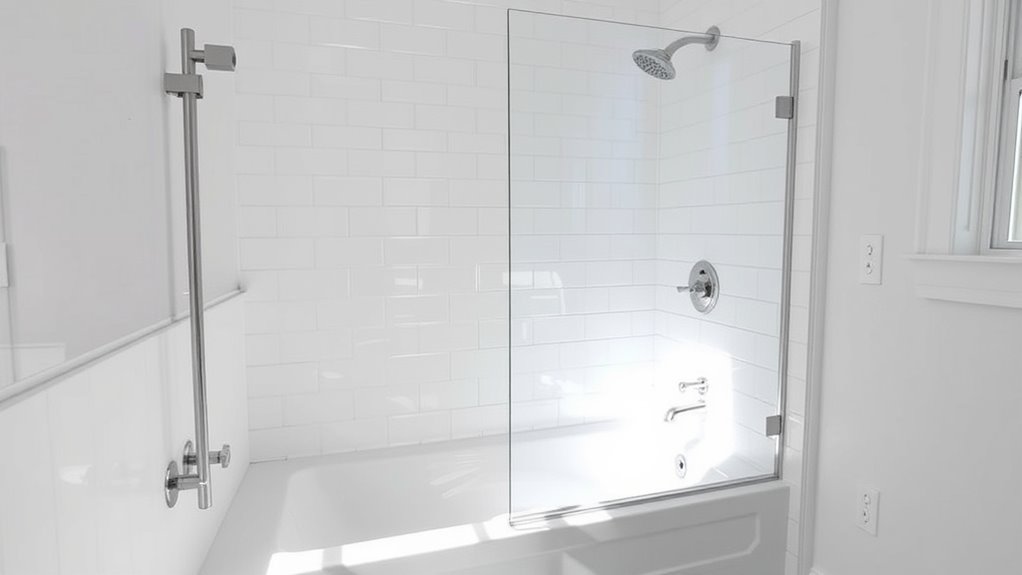
To convert your tub into a walk-in shower, start by evaluating your current space and planning a layout that fits your style and needs. Remove the existing tub carefully, then prepare the area by installing a sturdy, waterproof shower base and surround. Build or assemble a glass enclosure, guarantee proper waterproofing, and add fixtures like a showerhead and grab bars. For detailed steps on each phase, keep exploring to transform your bathroom effectively.
Key Takeaways
- Remove the existing bathtub carefully, ensuring proper disposal and minimal damage to surrounding walls.
- Prepare a level, sturdy subfloor and install a waterproof shower pan for proper drainage.
- Frame the new shower enclosure with durable materials, ensuring it is level and securely anchored.
- Waterproof walls and floors with membranes and seal all joints with caulk to prevent water damage.
- Install appropriate fixtures, such as a showerhead and glass enclosure, and finish with sealing and sealing caulking.
Assessing Your Current Bathroom Setup
Before starting your conversion, you need to carefully evaluate your current bathroom setup. Check the existing bathroom lighting to guarantee it provides adequate illumination for your new walk-in shower. Poor lighting can make the space feel smaller and less functional. Next, examine your plumbing system to identify any necessary upgrades. If your current plumbing isn’t designed for a walk-in shower, you might need to reconfigure pipes or install new fixtures. Assess the water pressure and drainage to prevent future issues. Consider the space available and how your current fixtures are positioned. Understanding your bathroom’s layout helps determine what modifications are required, facilitating a smooth transition from a tub to a walk-in shower. This evaluation sets the foundation for a successful project. Additionally, understanding angel number soulmate concepts can inspire a positive mindset during your renovation process.
Planning the Layout and Design

As you plan your new walk-in shower, consider how to make the most of your space with smart layout choices. Think about style and material options that match your aesthetic while ensuring durability and ease of maintenance. Balancing functionality and visual appeal will help you create a shower that fits perfectly in your bathroom. Incorporating natural materials such as stone or wood accents can enhance the overall design and add a touch of farmhouse charm.
Space Optimization Techniques
Effective space optimization begins with carefully planning the layout and design of your new walk-in shower. Focus on maximizing available space while maintaining functionality. Consider bathroom ventilation to prevent moisture buildup and mold; proper ventilation guarantees your shower stays dry and fresh. Incorporate smart lighting design to enhance visibility and create a welcoming atmosphere without cluttering the space. Recessed lighting or wall-mounted fixtures can save space and improve overall illumination. Think about the placement of fixtures and accessories to avoid overcrowding, keeping everything accessible yet unobtrusive. Use clear glass panels to make the area feel larger and more open. Additionally, selecting projector technology that complements your layout can enhance the overall ambiance and usability of the space. Combining these strategies helps you optimize space efficiently, making your new walk-in shower comfortable, functional, and visually appealing.
Style and Material Choices
Choosing the right style and materials for your walk-in shower sets the tone for both aesthetics and durability. Your choices influence how your bathroom looks and how well it withstands daily use. For bathroom aesthetics, consider sleek glass enclosures, modern tiles, or minimalist fixtures. Material durability is equally important; select tiles like porcelain or natural stone that resist moisture and chipping. Here’s a quick comparison:
| Material | Bathroom Aesthetics | Material Durability |
|---|---|---|
| Glass | Modern, open | High, easy to clean |
| Porcelain Tile | Versatile, stylish | Very durable |
| Natural Stone | Luxurious, unique | Requires sealing |
In addition, selecting natural materials can add authentic farmhouse charm while still providing longevity and resistance to moisture.
Gathering Necessary Tools and Materials

Before starting your tub-to-shower conversion, you need to gather all the necessary tools and materials to guarantee a smooth project. This guarantees you won’t face delays or surprises. First, you’ll need basic tools like a hammer, screwdriver, and utility knife. Second, gather materials such as waterproof backer board, shower pan, and sealing caulk. Don’t forget bathroom ventilation options—like an exhaust fan or vent cover—to prevent moisture buildup. Lighting options are also essential; consider waterproof LED fixtures for safety and visibility. Lastly, have safety gear like gloves and goggles on hand. Being prepared with these tools and materials helps streamline the process and ensures you create a functional, well-ventilated, and properly lit walk-in shower. Additionally, understanding the waterproofing process is crucial to prevent leaks and water damage.
Removing the Existing Tub Safely
Before removing the old tub, make sure to turn off the water supply to prevent leaks. Protect the surrounding walls and flooring to avoid damage during removal. Carefully disconnect and take out the tub to guarantee safety and prevent injury. Additionally, consider safety precautions such as wearing gloves and goggles to protect yourself from potential hazards during the removal process.
Turn Off Water Supply
To safely remove the existing tub, you need to turn off the main water supply first. This prevents water damage and makes the process safer. Before shutting off the water, consider water conservation by closing only the necessary valves if your home has separate controls for bathroom fixtures. Here’s what you should do:
- Locate your main shut-off valve, usually near the water meter or basement.
- Turn the valve clockwise until it stops, cutting off water flow.
- Open a faucet nearby to drain any remaining water.
- Double-check that water isn’t flowing by turning on the shower or sink.
- Be aware that some electric bikes can reach speeds of up to 50 mph, so safety precautions are essential during the removal process.
Turning off the water supply ensures a clean, safe removal, paving the way for accessibility improvements and a smoother conversion process.
Protect Surrounding Areas
How can you guarantee your surrounding areas stay protected during tub removal? First, cover nearby surfaces with drop cloths or plastic sheeting to prevent dust and debris from settling on your tile selection or lighting design fixtures. Remove any loose or fragile tiles around the tub to avoid accidental damage. Protect your lighting fixtures by covering them with painter’s tape or plastic guards. Keep the workspace well-ventilated to minimize dust buildup, which can stain or damage surfaces. Use a pry bar carefully to avoid scratching or chipping the surrounding tile. Regularly clear debris to prevent scratches or dents. Additionally, understanding the importance of clean workspace maintenance can help ensure your bathroom’s finishes stay intact and your lighting design remains undamaged throughout the removal process.
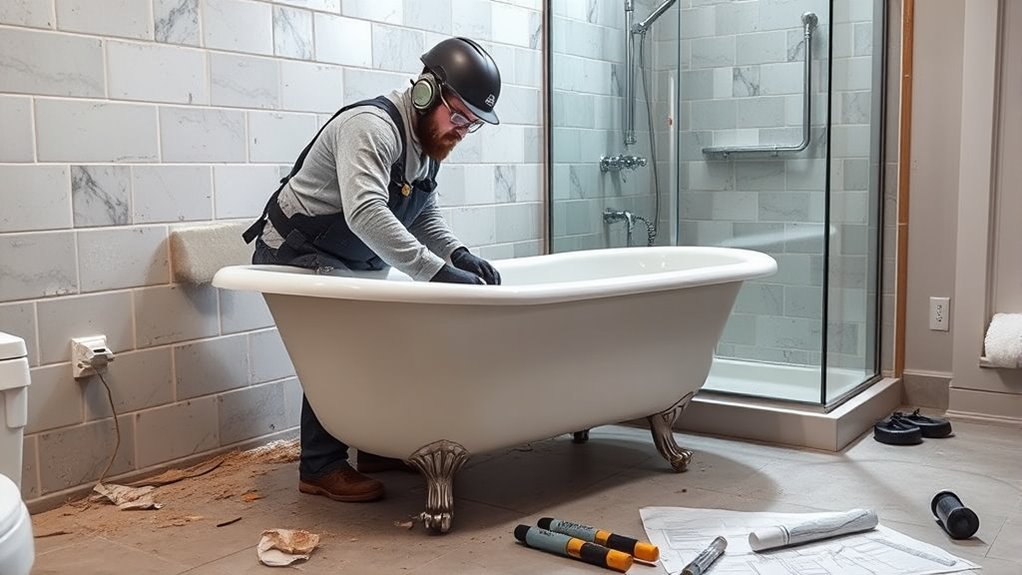
Remove Old Tub Carefully
Careful removal of the old tub is essential to prevent damage to surrounding fixtures and surfaces. When doing tub removal, take your time and plan each step. Here are four tips to help you remove the old fixture safely:
- Turn off the water supply and disconnect all plumbing connections before starting.
- Use a reciprocating saw or pry bar to carefully cut through the tub’s adhesive and framing.
- Protect nearby walls and floors with tarps or drop cloths to catch debris.
- Lift the tub slowly, enlisting help if it’s heavy, to avoid damaging tile or drywall.
- Ensure proper disposal and consider safety precautions to prevent injuries during removal.
Taking these precautions ensures a smooth tub removal process, setting a solid foundation for your walk-in shower conversion.
Preparing the Shower Base and Surrounding Area

Before you start installing the new walk-in shower, preparing the existing shower base and surrounding area thoroughly is vital. First, inspect the shower base for damage or cracks and repair any issues to guarantee a solid foundation. Remove any remaining debris, old grout, or adhesive from the area to create a clean surface. Check the surrounding area for water damage or mold, and address these problems before proceeding. Use a scraper or sander to smooth rough patches around the shower base, and apply a waterproof membrane if needed. Guarantee the area is level, dry, and free of moisture. Proper preparation prevents leaks, mold growth, and structural issues down the line, making your conversion safer and more durable. Additionally, understanding the importance of proper waterproofing can prevent costly repairs related to water damage in the future.
Installing the Shower Pan and Drainage System
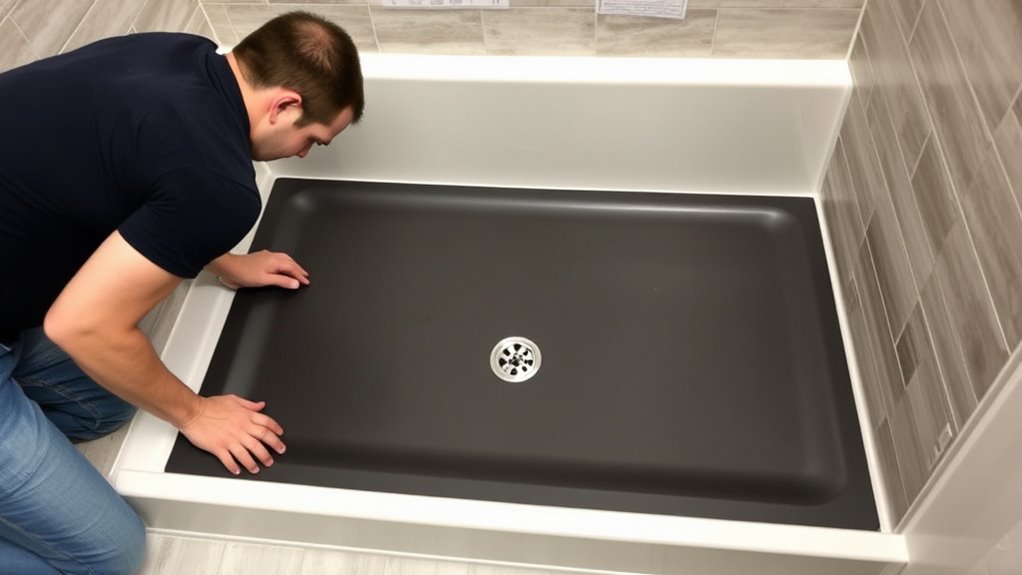
Installing the shower pan and drainage system is a crucial step in converting your tub to a walk-in shower, as it guarantees proper water containment and flow. Proper drainage planning ensures water moves efficiently to the drain without leaks. During shower pan installation, follow these key steps:
- Measure the shower area carefully to select the right pan size.
- Prepare the subfloor, ensuring it’s level and solid.
- Position the shower pan, making sure it fits snugly into the space.
- Connect the drain assembly securely, checking for tight seals.
Pay close attention to drainage planning to avoid future water issues. Use a level during installation to ensure proper slope toward the drain. Securing everything correctly now saves headaches later.
Building or Assembling the Shower Enclosure

Choosing the right enclosure material is essential for a durable and attractive shower. You’ll also need to assemble the frame carefully to guarantee stability and proper fit. Paying attention to these points will make your installation smoother and result in a professional-looking shower.
Selecting the Enclosure Material
Selecting the right enclosure material is essential for creating a durable and visually appealing walk-in shower. Your choice impacts not only the style but also maintenance and longevity. Consider these material options to match your preferred enclosure styles:
- Glass – Offers a sleek, modern look; available in clear, frosted, or textured finishes.
- Acrylic – Lightweight and affordable, with a variety of colors and textures.
- Tile – Provides customization and timeless appeal, but requires sealing and maintenance.
- Polycarbonate – Durable and shatter-resistant, suitable for unique enclosure styles.
Choose materials based on durability, aesthetics, and ease of cleaning. Your decision shapes the overall look and function of your new walk-in shower, so select wisely to match your design vision.
Assembling the Frame Properly
After deciding on your enclosure material, the next step is to assemble the frame that will support your walk-in shower. Use proper framing techniques to guarantee the structure is strong and stable. Start by measuring and cutting the framing components accurately, then secure the vertical and horizontal supports with corrosion-resistant fasteners. Focus on creating a solid foundation for the enclosure, as this provides essential structural support. Reinforce corners and joints with brackets or additional bracing to prevent shifting or wobbling. Make sure the frame is level and square before attaching the panels. Proper assembly ensures the durability and safety of your shower, preventing leaks or collapse over time. Take your time with framing to build a reliable, long-lasting enclosure.
Waterproofing and Sealing Techniques

To guarantee your walk-in shower remains watertight and durable, proper waterproofing and sealing are essential steps in the conversion process. Start by applying waterproof membranes to the walls and floor, ensuring all seams and corners are well-covered. Next, focus on grout sealing; use a high-quality sealer to prevent water infiltration and mold growth. Here are four key steps:
- Install waterproof membranes on walls and floors.
- Apply grout sealer to all grout lines.
- Check for gaps or missed spots and reseal as needed.
- Use silicone caulk around edges and corners for added protection.
These techniques keep water from penetrating behind tiles, extending the life of your shower and preventing costly repairs down the line. Proper sealing ensures your conversion stands the test of time.
Finishing Touches: Fixtures, Grab Bars, and Accessories
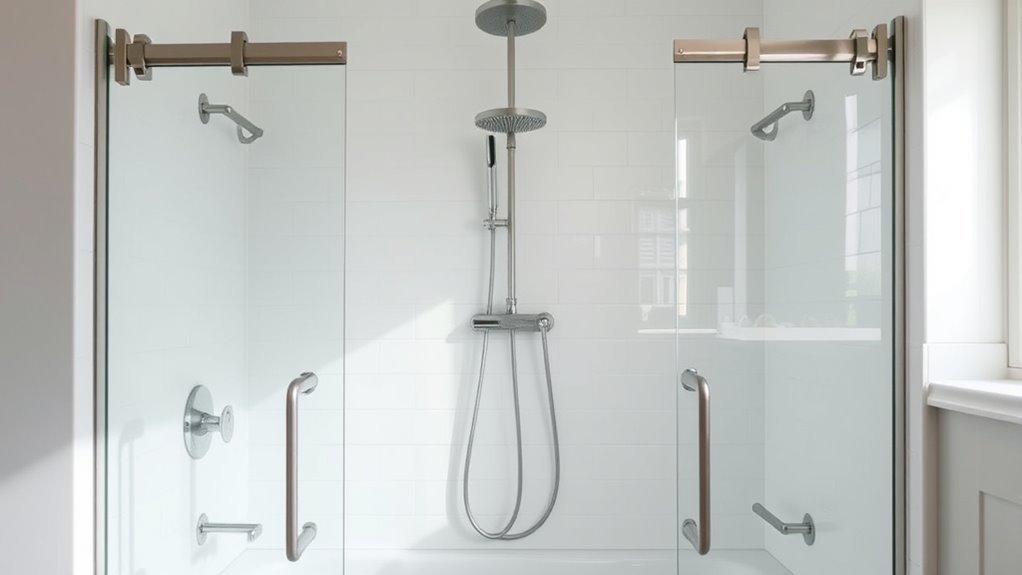
Once you’ve completed the waterproofing and sealing, the next step is to add the finishing touches that make your walk-in shower functional and stylish. Selecting fixture options, such as showerheads, controls, and hand-held sprayers, allows you to customize your experience. Proper accessory placement, like soap dishes, shelves, and towel bars, enhances convenience and safety. Consider the following fixture options:
| Fixture Type | Placement Tips | Style Suggestions |
|---|---|---|
| Showerhead | High on the wall for coverage | Modern or rainfall designs |
| Grab Bars | Near the entrance and seat | Textured for grip |
| Shelves/Disposers | Within reach, at waist height | Glass for sleek look |
Coordinate your fixtures and accessories to complement your overall design, ensuring ease of use and safety.
Final Inspection and Maintenance Tips
Before you start using your new walk-in shower regularly, it’s essential to conduct a thorough final inspection. Check for leaks around seals and fixtures, ensuring everything is secure. Confirm the drainage works properly without pooling water. Inspect the grout and caulking for gaps or cracks, as these can cause water damage later. Finally, review the accessibility features like grab bars and shelves for stability.
Here are some maintenance tips to keep your shower in top shape:
- Regularly clean the tiles and glass to prevent soap scum buildup.
- Check for mold or mildew and address promptly.
- Reseal grout lines annually to maintain waterproofing.
- Monitor fixtures and seals for signs of wear, replacing as needed.
Frequently Asked Questions
Can I Convert My Bathtub to a Walk-In Shower Without Professional Help?
You can convert your bathtub to a walk-in shower yourself, but be aware of DIY challenges like plumbing adjustments and waterproofing. You should follow safety precautions to prevent accidents, such as turning off water supply and wearing protective gear. Make sure you understand the plumbing and tile work involved, or consider consulting a professional if you’re unsure. Proper planning guarantees a safe, successful conversion that meets your needs.
What Is the Average Cost of Converting a Tub to a Walk-In Shower?
They say “you get what you pay for,” and that’s true for your shower conversion. On average, expect to spend between $1,500 and $5,000. Cost factors include material choices like tiles, glass, or acrylic, along with plumbing and labor costs. Custom features or high-end materials will raise the price. Planning ahead helps you stay within budget, balancing quality and affordability.
How Long Does the Entire Conversion Process Typically Take?
The installation timeline for converting a tub to a walk-in shower usually takes about one to two weeks. You’ll want to plan your renovation carefully, considering plumbing, waterproofing, and tile work. Depending on the complexity and contractor availability, it might extend slightly. To stay on schedule, coordinate all materials and schedule inspections in advance. Proper renovation planning guarantees a smooth process and minimizes delays, helping you enjoy your new shower sooner.
Are There Specific Building Codes I Need to Consider?
You should definitely check local building codes before starting your project. While it may seem like a hassle, legal compliance and permitting requirements guarantee your conversion is safe and up to code. Ignoring these can cause delays or fines. Contact your local building department to learn about specific regulations, including plumbing, waterproofing, and ventilation standards. Staying compliant makes the process smoother and gives you peace of mind.
Is It Possible to Add a Bathtub Shower Combo During Conversion?
Yes, you can add a bathtub-shower combo during your conversion. You’ll need to handle bathtub removal carefully and plan for shower installation, ensuring proper waterproofing and plumbing adjustments. Make sure to check local building codes before starting, as they might influence your design. Combining these features provides versatility and convenience, allowing you to enjoy both a quick shower and a relaxing bath in your upgraded space.
Conclusion
Think of converting your tub to a walk-in shower as guiding a ship into a new harbor. With careful planning, the right tools, and patience, you’ll navigate each step smoothly, arriving at a fresh, modern space. Once finished, your bathroom becomes a sanctuary—ready for new adventures and daily comfort. Embrace the journey, and soon you’ll enjoy a stunning transformation that’s as rewarding as reaching a safe port.